Electron Engine ™
Printed Circuit Boards by Emissionlabs
Burning in tubes with the EE61 board
This was not why the EE61 Board was designed, but since it can run in Mixed bias, the complete circuit for burn in existed already.
Just to mention it here, we also have a burn in kit for 9-Pin NOVAL tubes, for DIY builders. Link is further down in this text.
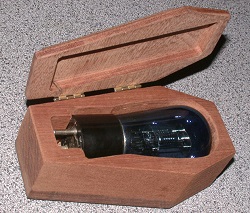
The EE61 board is made for DHT tubes, UX4 base. These are normally older type, larger bulb tubes. I was on the phone sometimes with George Fathauer. He was had such unbelievable knowledge, and yet so down to earth. He told me often, he liked pre-Octal tubes a lot more, because of best quality in general.
Burn in is the universal treatment for factory new tubes, and it will remove almost very problem. Such as grid current, instability, distortion, etc etc. Also it brings all tube parameters closer to the data sheet average. With used tubes, it is not quite the same, but we need to know that long time storage will slowly take away again the good effects of burn in. Some tubes need a decade, others degrade almost not at all after 50 years, but one way or another, storage is not the best thing. The effect can be reversed, as long as it was not too much. One thing is not easy to cure, and that is gas caused by long time storage. Good vacuum is initially created at those few seconds in production, where the getter is evaporated. At that short moment the getter is so highly active, as it never will be again. Apart from this, many other defects can be cured, or partially reversed.
Repairable defects can be: Grid current and low emission. Burn in is not like pressing a button, and it is not a method to make worn out tubes new again. There is however a good use for it.
Some like to simplify it. When you see such people telling their tales on Youtube, wearing a white doctors coat, and using an old tube checker for this, it may look nice, but it is also silly.
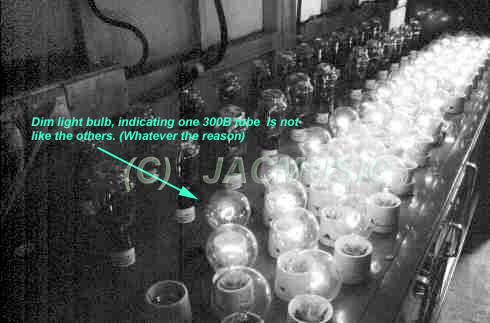
Just for who in interested, this was the burn in street of Alesa Vaic Vacuum Technology, in 1998, I still have the original picture in color.
Burn in gassy tubes.
The word GASSY tube is used, when somebodies tube checker reacts, while pressing the 'Gas Test' button. So it seems the tubes have gas. In reality, nobody can measure "gas" from the outside. All we can do, is measure grid current, and from there, try to say what is the reason. Now, grid current can have many causes. if caused by something ELSE than gas, it may indeed be repaired sometimes, and voila: Somebody think he cleaned the vacuum, he tells the world about it on his channel.
But I think the opposite is true. Myself I was NEVER able to repair a gassy tube, by burning it in. Believe me, I tried it. Even evaporating the getters a second time, it did not help. (You can heat up the getters with a soft flame). So this particular "repair" I think is just a silly misunderstanding. What they did, they just burned in the tube, and the grid current was gone. Perhaps it dried the tube socket a the inside. Then the gas test was passed, and they think they just restored good vacuum again.
Burn in tubes with grid current.
That is possible, and there are cases where it really helps. Particularly with tubes that have seen two or more decades of storage. It does not seem to help when tubes have been recently over heated, and excessive grid current appears.
Burn in tubes with low Emission.
That works reasonable when this was caused by under heating. The filaments active layer evaporates slowly, and at the same time it re generates from within, from what is called the Barium 'depot'. This is a delicate balance, and needs EXACTLY the correct heater voltage. At less than 95% heater voltage, regeneration becomes too slow, and in the end the tube stops working. Eventually, the tube tests like junk on any tube tester. This seemingly catastrophic result is reversible though. The recovery process is individual, so depends on the tube type, the brand, and how far the damage has gone. Basically it works like this:
SETUP: Use the MIXED Bias circuit. Use no SE transformer, and insert a fuse. Attach a DC voltmeter to the Rm Output, to measure DC current.
- Connect a negative voltage supply to the VAR input but set it at 0V. We may perhaps need it later.
- Do the circuit settings with a good tube, and set this tube for 100% of maximum dissipation, without using the VAR input. Using plate voltage and current, somewhere in the range of normal use. This choice is not so critical, but do not use extreme high voltage and extreme low current, or vice versa.
- When the good tube works as it should, write down it's test result. Now replace it by the bad tube, and write down it's test result as well. Now he have two values: For a good and for a bad tube.
- Further text is for the bad tube:
- Without anode voltage, heat the tube for 15 seconds at 120% heater voltage.
- While not switching off the filament, reduce to 110% and let it run 1 minute.
- While not switching off the filament, reduce to 105% and let it run 5 minutes.
- While not switching off the filament, reduce to 100% and let it run 20 minutes.
- Switch off.
- Restore the anode voltage as we had it before, use normal heater voltage, and switch on the tube. Observe carefully the anode current. After some 2...10 minutes you MAY see anode current begins to climb. If so, do NOT interrupt it, before the tube becomes stabile.
- If no climbing occurs even after 30 minutes, the tube is given up. Procedure ends.
- If climbing occurs, you must act, when dissipation rises above 80% of maximum. In this case give a small (negative) voltage at the VAR input, in order to reduce the current down to 50...60% again, and watch further climbing. (hopefully....) Do this without interrupting the process!.
- If it became stabile somewhere at relatively good level, this is as best as you can get the tube. Procedure ends.
- If it became stabile at relatively low level, you can increase the heater voltage at 105% all of the time, and it will stabilize at a higher level. After final stabilizing, go back to 100% filament voltage. This will make the current slowly reduce, but the question is, if it stabilizes now at a somewhat higher level as before. If yes, repeat this as long as it helps. Do this without interrupting the process!. If there was no further result, this was as far as we could save the tube. Procedure ends.
- Set the VAR voltage to zero, and anode voltage same as with the good tube, and do a final compare between the good and the bad tube. It depends where you get the problem tubes from, but sometimes results are so excellent, and sometimes nothing changes at all.
Over heated tubes or end-of-life tubes.
If there is still good emission, but excessive grid current, you can try to do a grid cleaning procedure, but this is specialists work.
 Over heating causes much faster wear out, but End-of-life, can not be repaired by burn in. There comes an end to every tube....
For NOVAL Tubes, we have a special tube burn in kit for DIY builders.