About Silver Solder
Description
When using lead free (silver) solder for the first time, you are probably disappointed. The solder joint looks bad. Lead-free soldering is not more difficult, but mostly it is ANOTHER process, and you probably don't know that. All you need to do is change the way you are soldering, and you can have very nice results. Lead-free soldering was always done to get solder joints of higher stability. So... what keeps you from doing it? .
Here is a typical problem situation:
You want to add a wire to an existing connection. When doing so, the solder joint gets too big and dirty. The components around it start to over heat, and the solder is still not flowing well.
What causes this problem?
Here is the difference: With old type, lead containing solder, the moment it melts, already little flux will make it l flow nicely. The flux is active from the moment the solder has melted, and lead solder melts at the same temperature where the flux is burning dark, and then doing it's job well. Lead containing solder is has good solderability, no whisker forming, but there is some cold flow. (Cold flow means the solder "flows" over the years)
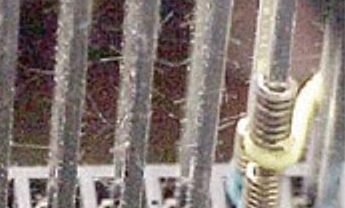 Not so with lead-free solder. Pure tin is too soft. Besides pure tin forms so called whiskers, which are needle shaped, hair fine crystals, which can cause a short circuit on PCBs, switches, etc. Pure tin can't be used for anything because it recrystallizes over the years, and badly changes it's shape. So something has to be mixed inside, to make it harder, avoid re-crystallisarion, and yet nicely soldeable.
Pleas make note, when creating an alloy, the result is not an average of original metals. So melting temperature, hardness and color may change surprisingly in any direction, and also very small traces of a particular metal, can give considerable changes. It seems, silver is the ) best metal to use, after lead. So that's why lead free solder is also "silver" solder. It does contain also other metals, such as copper, and with Mundorf Supreme Silver-Gold solder, even a small dot at ion of real gold, to get the required properties.
What stays however, is for electronics a disadvantage: The higher temperature. So it is important to solderi fast. But here comes the problem, it just doesn't "wet" the surface as easy as lead containing solder. It needs to be soldered even longer. It's just how this is.
For a good result, you have to heat up the joint, until the flux starts to burn dark brown. This may seem like "burned" because of the smoke and the color. It is however this dark brown condition, combined with heat, when the resin gets highly reactive. It can now even take away the oxygen molecules from metal oxide, and that's what we want it to do. The oxide is not just removed from the objects we solder, but also from the solder itself. So a dark, crumbling surface of the melted solder becomes shiny and clean.
The resin smokes away, reducing the oxides to pure metal again. And then the silver solder can penetrate the metal below, and we see the solder "flow" when that happens.
A cold solder joint?
The solder is not just sticking on the surface, it goes into the metal. This penetration is only possible with "solderable" metals. Like copper and brass, and nickel. If there was no good penetration, we call it a "cold solder joint". So a cold solder joint may look nice initially, but after some years it gets loose. If you try to solder metals which look like nickel, but is in fact a lower cost alloy, you have a high risk on a cold solder joint. So it looks good only initially, but will come loose after 5...10 years.
The moment, the connection is made.
When the flux goes up in smoke, it is most active. However, this moment is short, since the burning flux is disappearing quickly. This makes the moment of good solder flow short, and you can only make small solder joints, like solder two wires together. The moment you need to do something larger, you simple need to apply a great lot of extra flux, or even apply it a few times. I have tried everything, but I find using a lot of flux the only way. For best optical results, you can remove the flux residue afterward with alcohol, and it will look very nice.
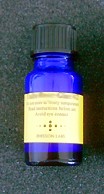
Ordering code: 610-007-76
This is a liquid flux, of highest possible concentration, so as much as possible will stay on the object. It looks like honey. If for some reason you find it too thick, you can use alcohol to make it thinner.
You can also use it to prepare printed circuit boards before soldering. For this application, mix 1 part of the liquid solder flux with 1 part alcohol. Paint the PCB with this, let is dry on the air for one hour, or dry it with air from a hair dryer. When dry, solder the PCB the normal way. Don't bother how it looks afterwards, you can remove the residue nicely with 100% pure alcohol.
Hint: Resin in a good glue. So keep the bottle clean before you close it. If in any case you glue the lid on, with spoiled residue, you can open it after warming the lid with very hot water, or leave the closed bottle in alcohol a few hours.
How to apply extra flux?
The good old way, to dip the solder iron into some flux is not working with lead free solder. The flux is burning away immediately on the solder iron. The small residue that is left, will not spread over the solder joint insufficient, and you may just burn the components.
Process for larger solder joints:
Apply liquid flux on all surfaces that you want to solder. Use as much as you can apply on it. Better take too much as too little, any residue can be very easily wiped off afterwards with a cloth and some alcohol.
With litz wires, apply liquid flux solder before you solder them. Then pre solder those very thin, before soldering the Litz wire into the solder lug.